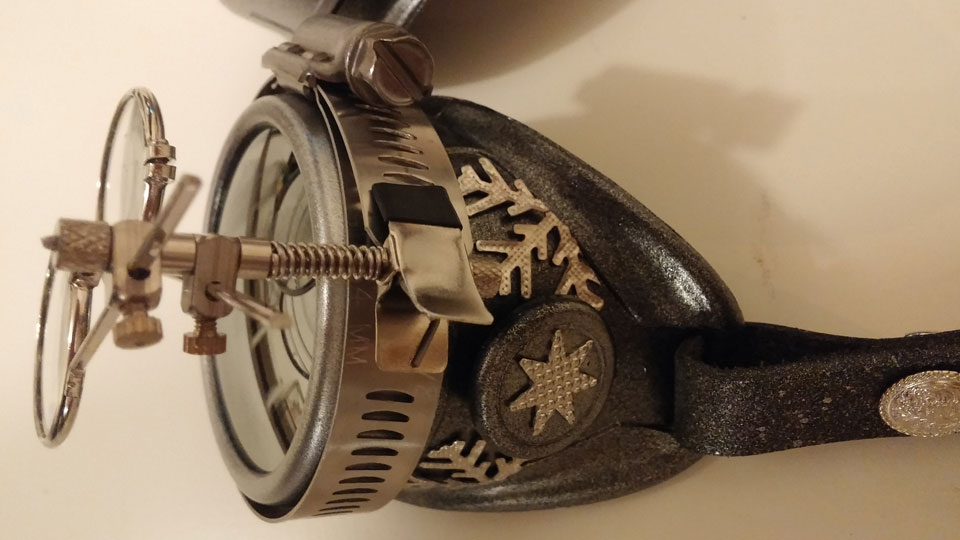
How to Winterize Your DIY Steampunk Goggles for 2015
You may have stumbled across these winter goggles on our website. They’re a great accessory for winterizing your steampunk attire at your next event, without a whole lot of work. The metallic snowflakes pop out against the dark gray textured goggles while matching harmoniously with the silver eye cups and mirrored lenses. In this article, we’re going to show you how to make this pair of steampunk goggles to add a bit of sparkle to your costume this winter season. For convenience, everything may be obtained on SteampunkGoggles.com, with the exception of the metallic spray paint.
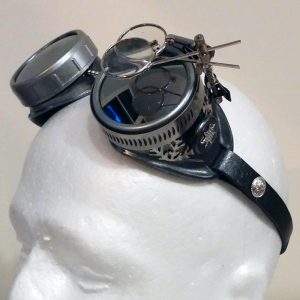
DIY Materials & Parts You’ll Need
Making these goggles is pretty straight-forward, and you may choose to take a few time-saving shortcuts while still achieving a spectacular look. Here’s what you’ll need:
Tools
- 1 pair of needle-nosed pliers
- 1 pair of wire cutters
- 1 flat-blade screwdriver
- 1 pair of disposable rubber gloves
- 1 hobby knife or a pair of strong sheers or scissors capable of cutting through metal foil
Materials
- 1 can of Silver metallic spray paint (available at most hardware stores)
- 1 tube of super glue or a similar adhesive
- 1 roll of 0.70” masking tape
- 1 Empty paper towel tube
- 3 thumb tacks
- Optional: if you’re messy or forget to put your gloves on, then you’ll want to pick up a bottle of nail-polish remover (acetone) from the local pharmacy.
Parts
- 1 Pair of plastic welding goggles
- 1 pair of sunglasses with mirrored lenses (50mm diameter)
- 1 set of metallic snowflakes
- 1 leather strap kit with silver toned buckle and rivets (or optionally you may choose to dye and punch your own 1/2″ leather strips and add buckles and hardware separately)
Optional Parts & Upgrades
- 2 upgraded silver screw-in rivets with flourishes (requires hole puncher to widen holes on straps)
- Clamp and eye loupe, or the DIY goggles kit (includes goggles, strap, eye loupe, clamp and other hardware)
- Clear acrylic lenses (50mm) – this is a safety upgrade to replace the glass lenses that come with the goggles
Step 1: Deconstruction
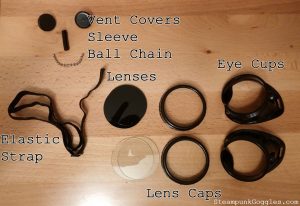
Before you can begin your project, find a nice, spacious area to work. I’d recommend having a little box nearby too. You’re going to want to take everything apart, starting with the goggles. There are a lot of small pieces that can get lost if they fall on the floor, so be careful. For example, if you lose the short ball-chain that connects both sides of your goggles, then you’ll render them useless.
Take the goggles apart completely.
- Remove the elastic strap first by grabbing both sides of each plastic clip and sliding it off.
- Unscrew the lens caps carefully, one side at a time.
- Take out the clear glass lens as well as the dark plastic welding lens underneath. You’ll be reusing the glass ones as a spacer behind the mirrored lenses Safety tip: glass is great for welding because it doesn’t melt in the same way that plastic does. However, glass breaks. We strongly recommend replacing the glass with clear acrylic lenses.
- Remove the ball chain and plastic sheath and put those pieces in your little box so they don’t get lost
- Remove the two circular vent caps from the eye cups and put them in the box. They just pop out and can pop back in.
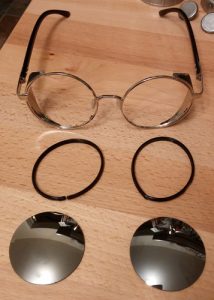
Carefully Remove Lenses From Sunglasses
This part is tricky, as you don’t want to damage the lenses.
- Wear rubber gloves to avoid finger prints and scratches
- Pop each lens out of the frame carefully by pushing on the outer edge from the inside, toward the front of the sunglasses on one side. You should now have a mirrored lens with a black rim around the edge
- With the needle-nosed pliers, remove the black rim. This is done by carefully stretching it on one side. You may be able to pop the lens out at this point, but to make it easier on yourself, take a pair of wire cutters and snip the plastic rim once you’ve got a little space between it and the lens. It’ll be easy to peel away at that point
- Put the lenses somewhere that is safe from debris, tools and glue to prevent damage
Prep Your Straps
If you decided to get the rivets with flourishes on them, then you’ll need to widen the two holes at one end of each strap, as these rivets have a larger diameter than most. Otherwise, put the buckles and rivets into your little box so that they don’t get lost.
Step 2: Paint Your Parts
This is the fun part, but it takes a delicate touch. If you’re not used to spray-painting, then go gently and apply minimal pressure on the nozzle. You can always go back and apply another coat.
Prep the Goggles
We use this process to prep most of the goggles we create in-house. Once you do one pair, it will become obvious how you can paint several pairs of goggles at once in this fashion. You could lay your parts out flat on the ground instead of the process outlined below, but you’ll end up using more paint and may have more edges to touch up afterwards.
- Slide the two eye cups over the paper towel tube such that the threaded ends are butted up against each other. Position them around the middle of the tube. Take the 0.70” masking tape and peel off a strip that’s about 6.5” in length. Wrap this strip of tape over the threads to protect them during the spray-painting process. It’s ok to leave the outer edge of the threading uncovered so that the black doesn’t show through when you replace the lens caps.
- Poke a thumbtack into the paper towel tube, underneath the lens cups when the tube is held vertical, about 1.5” up from the bottom of the tube. Slide the lens cups down until the edge is just over the thumb tack. This will keep it in place while the paint is drying.
- Poke another thumbtack into the tube about 2-3 inches above the top eye cup. Slide your first lens cap down over the tube until it’s just over the thumbtack. This will help protect the threading on the inside.
- Poke the next thumbtack into the tube about 0.5” above it, and slide the second lens cap down over it.
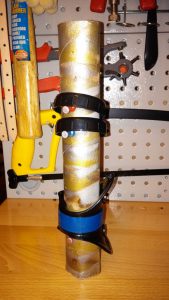
Paint the Goggles & Leather Strap
- Wear your gloves and if you have another pair of goggles around, wear those too. You’ll be applying spray paint to these surfaces and it may produce harmful fumes. Be sure to read the manufacturer’s directions before use.
- Start by painting the lens caps. Practice using very light pressure on the spray can during this phase, because you’ll need that light touch to treat the eye cups with a thin mist of paint. Using a smooth, even flow, paint all around the lens caps until they’re completely covered. It’s ok if you let some black show through at this point so that the paint doesn’t get thick and runny. You can apply a second coat after they dry to clean up the imperfections.
- Next, paint the eye cups. To achieve the look of these goggles, you’re not going to paint a solid layer. Rather, you will mist them in paint. Hold the can 12-18” away from the eye cups and very gently apply pressure to the nozzle. The goal is to get a very faint layer of speckles over the entire surface, to give them a sheen rather than a solid silver color. If this does not work out then just paint them silver. It’s not quite the same look, but you may need some practice to master this technique.
- Stand the tube in a dry place and allow the paint to set. When they’re completely dry, inspect the pieces and touch up any imperfections if you need to. Depending on the paint you use on the lens caps, the silver might appear flat, lacking luster after it dries. This is most likely because gravity caused the metallic flakes in the paint to fall to the bottom. To resolve this, spray a very light layer of paint over them again – just enough to add some sparkle without providing enough liquid to flow to the bottom.
- Use the same, very light misting treatment on the strap that you used on the eye cups. Again, we want just a metallic sheen on them, as if they’re frosted from the cold weather.
- Place the vent caps on the ground where they won’t get lost, pointy side towards the painting surface. Use the same misting process and paint the outer surface of the vent caps with a thin sheen.
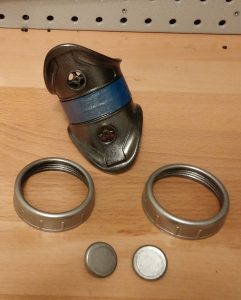
Step 3: Apply the Snowflakes
Before you begin, you’ll want to take a quick look at the old Farmer’s Almanac from 1792 to familiarize yourself with snowflake shapes. There’s a chart on the page that illustrates many shapes, including those that we use in the design. Make sure the paint is completely dry before applying these decals.
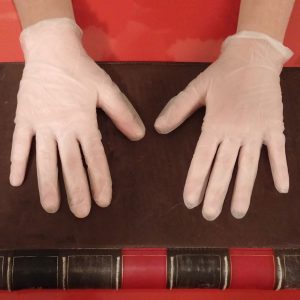
- Wear your gloves and if you have another pair of goggles around, wear those too. You’ll be applying super-glue to these surfaces and it may produce harmful fumes. Plus, the glue is impossible to remove from your fingertips without a bottle of nail polish remover (acetone) handy.
- Take one stellar dendrite snowflake decal and cut it in half. Curve the inside slightly and place the half-a-snowflake over the outer edge of the first eye cup with the cut side towards the outer rim. Use your hobby knife or scissors to shape the cut edge so that it forms neatly into place.
- Put a few drops of super glue onto the inner surface of the first half-snowflake and position it carefully. Less is more here – don’t make a mess with too much glue. Once it’s in place you can apply pressure for 10 seconds to form the seal. But, be careful – if you apply too much glue then your gloves will stick and you’ll end up with holes in them.
- Apply the second half of the snowflake below, then repeat this process for the other eye cup.
- Next, apply a few drops of glue to the top of a small circular vent cover and affix one of the small stars to it, being careful to center it as best as you can. Don’t worry – the vent covers spin once reattached for proper alignment.
- Affix the second star to the second vent cover.
- Allow all of the glue to dry thoroughly, and be careful not to touch or damage anything with your sticky fingers.
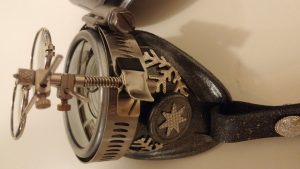
Step 4: Put it All Together
Here’s the last part, which I think is the most fun because you’ll have a pair of finished goggles within 10 minutes.
Put the Goggles Together
- Put the ball chain into the groove of one eye cup. Generally 3 balls on the inside of the lens will result in a good fit for an average-sized face. If you have a smaller face then put 4-5 spheres on the inside. Slide it all the way to the bottom of the groove, then set down the eye cup.
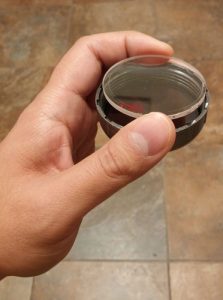
- Start with the first lens cap. Put your first mirrored lens into it, reflective surface on the outside. Be careful not to scratch it.
- Put your clear lens in, directly behind it. The sunglasses lenses are the perfect diameter for goggles, but they’re too thin, so you need a spacer to allow the lens cap to screw down snuggly over them. Otherwise the lenses will rattle around noisily and the goggles will feel cheap and incomplete.
- Using your dominant hand, hold the lens cap parallel to the floor with the lenses nestled in it facing he bottom. With your other hand, hold the eye cup above it, threads down, and be careful not to let the ball-chain slip out of place. Screw the lens cap over the cup until it’s fully seated. We like this upside down technique because the lenses will rest where they belong, producing minimal damage to the surface.
- Slide the other end of the ball chain into the groove of the other eye cup. Using a similar process, screw the second eye cup into place.
Add the Leather Strap
- Each strap will have one end with two holes in it. Start with one strap, and slide this end through the slot on the side of the first eye cup, until the space between the holes is centered nicely and the holes align.
- If you have a belt loop with your straps, then be sure it is over the buckled strap, not the part that inserts into the buckle.
- Take your first rivet / Chicago screw and put the female side through the outer hole, and then through the inner hole. Take the male side of the unit and screw it into place. Generally you can do this by hand, but you may opt to use a flat-blade screwdriver. It’s best to put the female side through first, to prevent the male side from pinching the leather when you screw it into place. For a more industrialized look, you may opt to put the female part in through the inside instead, exposing the flat groove in the screw.
- Repeat this process on the other side.
- If the buckle is not already attached, then find the strap with 3 holes on the end. Put the strap through one side of the buckle, and slide the buckle’s prong through the center hole. Align the two other holes and attach a rivet as above. If you opted for two embellished rivets, then those should be used on the parts closest to the body of the goggles, and you can use a plain one by the buckle since it will be covered with the strap when worn.
Add the Clamp and Eye Loupe
If you opted for the double eye loupe, then this is the last part, and you’re done!
- Decide which eye you want the loupe to go over. Put the clamp around that lens’s cap with the bulky side on top. Using your flat-blade screwdriver, tighten the clamp until it almost firmly in place. Adjust it slightly if needed, so that the screw is centered evenly, then tighten it completely.
- The eye loupe will clip to the metal tab that’s hanging over the edge of the clamp where you were tightening it. If you find that the tab is too long, then use your needle-nosed pliers and bend the tab approximately in half to shorten it.
- Clip the eye loupe to the metal tab.
Customizing Your Goggles
You’re done! You should now have an amazing pair of winterized steampunk goggles that you can wear anywhere. Save the elastic strap in case you find it more comfortable or more functional for your particular use. The screw-in rivets are ideal for easy removal and reattachment of the leather strap if you want to swap it out in this fashion. Want a different look? Here are a few ideas for you:
- Try a different set of sunglasses. The glasses with side shields on this page that are in the same style as the mirrored ones above will all work as long as you see the metal trim on the outer edge of the shields. These will not work because there is no metal trim on the shields and the diameter of the lenses is too big.
- Pick up a set of multicolored goggle lenses or gray goggle lenses to save the cost of the glasses. You won’t get the domed mirror effect (goggle lenses are flat) but they’ll still look sharp and you’ll save around $10.
- Try a different color scheme. For example, gold or brass-toned paint with brass hardware and the lenses from these sunglasses is a great look.
I hope you enjoyed this little tutorial on making a pair of steampunk goggles for yourself. Sometimes money is tight and doing some of the work yourself is a great alternative to buying a completed pair. Happy Holidays, and we’ll see you in 2015!
